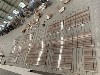

Laying outdoor floor tiles using natural stones like granite and basalt requires careful planning and preparation. Here is a general guideline in English for the installation process:

1. Planning and Preparation:
Determine the area and shape of the outdoor floor to be tiled.
Measure and calculate the number of tiles required.
Consider the drainage and slope of the area to ensure proper water runoff.
Prepare the necessary tools and materials, including tiles, mortar mix, tile spacers, leveling tool, wet saw (or tile cutter), buckets, tape measure, etc.
2. Substrate Preparation:
Clean and inspect the substrate (e.g., concrete, brick, or natural stone).
Remove any debris, dirt, or loose material.
Repair any cracks or uneven areas in the substrate.
Apply a leveling compound or self-leveling underlayment if needed.
3. Layout and Marking:
Lay out the tiles in a dry fit to ensure the pattern and color variation are satisfactory.
Mark the starting point and use a chalk line or tape measure to create a grid for tile placement.
4. Mortar Application:
Mix the mortar according to the manufacturer's instructions.
Apply a thin layer of mortar to the substrate using a trowel.
Ensure the mortar is evenly distributed and of the proper consistency.
5. Tile Installation:
Place the tiles onto the mortar, starting from the marked starting point.
Use tile spacers to maintain even gaps between tiles.
Press the tiles firmly into the mortar, ensuring they are level and aligned.
Cut tiles to fit around edges or obstacles using a wet saw or tile cutter.
6. Grouting:
Allow the mortar to set for the recommended time (usually 24 hours).
Mix the grout according to the manufacturer's instructions.
Apply the grout into the gaps between the tiles using a grout float.
Remove excess grout from the tile surface using a damp sponge.
7. Sealing (Optional):
Consider applying a sealant to the tiles to protect them from stains and weathering.
Follow the manufacturer's instructions for applying the sealant.
8. Cleanup and Final Inspection:
Thoroughly clean the tiled area, removing any remaining mortar, grout, or debris.
Inspect the tiles for any irregularities or damaged tiles.
Make any necessary repairs or adjustments.
Remember to always follow the manufacturer's instructions and safety guidelines when working with natural stone tiles and materials. It is also recommended to consult with a professional if you are unsure about any part of the installation process.