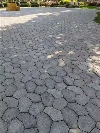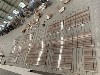

Here's a comprehensive guide to laying travertine pavers:
Phase 1: Planning & Preparation (Crucial!)
1. Design & Layout:
- Sketch your design, including patterns (running bond, herringbone, etc.), borders, and dimensions.
- Calculate Materials: Measure the area (length x width = sq ft). Add 10-15% extra for cutting waste, errors, and future repairs. Determine needed amounts for:
- Travertine Pavers (check thickness - typically 1 1/4" or 1 1/2" for driveways)
- Excavation Depth: Base (4-8" compacted) + Bedding Sand (1") + Paver Thickness + Allowance for slope.
- Base Material: Crushed gravel (Class II Road Base, 3/4" minus aggregate) - Calculate volume (sq ft x depth in ft).
- Bedding Sand: Coarse, sharp, concrete sand (NOT play sand) - About 1 cubic yard per 100 sq ft at 1" depth.
- Edge Restraints: Concrete, plastic, or metal.
- Jointing Material: Polymeric sand or jointing stone.
- Geotextile Fabric: Optional but recommended over soil to prevent base migration.
- Sealer: Penetrating, enhancing, or natural finish sealer suitable for travertine.


2. Site Preparation:
- Mark the Area: Use stakes and string lines to outline the project, including the finished height and slope (1/4" per foot away from structures).
- Excavate: Dig to the calculated depth. Ensure the soil is compacted and level. Remove all vegetation, roots, and debris.
- Install Geotextile (Optional): Lay fabric over the compacted soil to prevent weeds and base migration.
Phase 2: Building the Foundation
3. Install Base Material:
- Layer & Compact: Spread the crushed gravel base in 2-3 inch lifts (layers). Thoroughly compact each lift with a plate compactor (essential!). Aim for a minimum 4-inch compacted base for patios/walkways, 6-8 inches for driveways or heavy use areas.
- Check Grade & Slope: Constantly check the slope and level using a long level or string lines. The compacted base must have the final slope and be perfectly flat.
4. Install Edge Restraints:
Set sturdy restraints (concrete, heavy-duty plastic, or metal) around the perimeter. Secure them with stakes driven into the base material. These prevent pavers from spreading outward.
5. Apply Bedding Sand:
- Lay Pipes/Conduit: Place 1" diameter pipes or rigid conduit on the compacted base, parallel, about 3-4 feet apart.
- Spread Sand: Pour concrete sand over the base and between the pipes. Use a long, straight 2x4 screed board pulled along the pipes to create a perfectly flat, 1-inch thick layer. Do NOT compact this sand.
- Remove Pipes: Carefully remove pipes and fill the voids with sand, leveling gently with a trowel. Avoid walking on or disturbing the screeded sand.
Phase 3: Laying the Travertine Pavers
6. Start Laying:
- Begin at a Corner: Start laying pavers in a 90-degree corner or against a fixed structure like a house foundation.
- Work Outwards: Lay pavers outward from your starting point.
- Pattern: Follow your planned pattern meticulously. Use spacers (like plastic tile spacers or small sticks) if needed for consistent joint width (typically 1/8" to 1/4" for polymeric sand, wider for jointing stone).
- Handling: Lift pavers carefully into place; do NOT drag them across the sand bed. Set them down gently but firmly.
- Check Level & Slope: Use a level frequently as you lay. Tap high pavers down gently with a rubber mallet. Add a sprinkle of sand under low pavers if necessary. Maintain the slope.
- Cutting Pavers: Use a wet saw with a diamond blade for clean cuts (rental is common). Mark cuts carefully. Wear safety glasses and a mask! Cut pieces for edges and borders as you go.
7.Work Efficiently:
- Work on sections you can reach without walking on the screeded sand or freshly laid pavers.
- Mix Pallets: Pull pavers from multiple pallets simultaneously to blend natural color variations evenly.
Phase 4: Finishing
8. Initial Compaction:
Once the entire area is laid, run the plate compactor over the pavers with a protective pad (like a plywood sheet or thick rubber mat) to settle them evenly into the sand bed. Go over the area in multiple directions.
9. Apply Jointing Material:
- Sweep In: Pour polymeric sand or jointing stone over the pavers. Use a push broom to sweep it thoroughly into all joints until they are completely filled. Work diagonally to the joints.
- Excess Removal: Sweep all excess material off the paver surfaces completely. Any residue left on top can cause hazing.
- Compaction (Polymeric Sand): Compact the pavers again with the protective pad to settle the sand deeper into the joints. Sweep in more sand if joints settle.
- Activation (Polymeric Sand ONLY): Lightly mist the entire surface with clean water according to the manufacturer's instructions. This activates the polymer. DO NOT over-saturate! Multiple light passes are better than one heavy soaking. Avoid disturbing the sand during watering. Allow to cure completely (usually 24-72 hours, no traffic).
10. Sealing (Highly Recommended for Travertine):
- Allow pavers and jointing material to cure fully (check jointing sand cure time, typically 1-3 days).
- Ensure pavers are perfectly clean and completely dry.
- Apply a high-quality penetrating sealer suitable for natural stone/travertine using a pump sprayer, roller, or brush. Follow manufacturer's instructions precisely (coverage, drying time between coats). Sealing protects against stains, efflorescence, and enhances color.
- Avoid sealing in direct sun or extreme heat.
Essential Tools & Materials:
- Tools: Tape measure, stakes & string line, shovel, wheelbarrow, plate compactor (rental), hand tamper, rake, screed board & pipes/conduit, level (4ft & torpedo), rubber mallet, broom (push & stiff), masonry chisel, wet saw with diamond blade (rental), safety glasses, gloves, knee pads, dust mask, garden hose with sprayer, pump sprayer (for sealer).
- Materials: Travertine pavers, crushed gravel base, concrete sand, edge restraints, polymeric sand or jointing stone, geotextile fabric (optional), travertine sealer, spacers (optional).
Critical Considerations for Travertine:
- Thickness: Use thicker pavers (1 1/2" or more) for driveways or high-traffic areas.
- Fill: Travertine has natural voids/pits. Decide if you prefer a "filled" (holes filled with resin/cement) or "unfilled" look. Filled is generally easier to maintain.
- Sealing: Sealing is vital for longevity and stain resistance, especially on unfilled stone and in high-stain areas. Re-seal periodically (every 2-5 years).
- Cutting: Travertine cuts relatively easily with a wet saw but produces slurry. Wear protection.
- Weight: Travertine is heavy. Get help lifting pallets and moving pavers.
- Professional Help: For large areas, complex designs, driveways, or if unsure, consult or hire a professional hardscaper.
By following these steps carefully and prioritizing the foundation (base and sand bed), you'll create a beautiful and durable travertine patio, walkway, or driveway. Good luck!